How to Make Your Own Almond Milk

I love buying almond milk, but I hate how it can be so expensive and most brands have added preservatives. I had no idea that making my own milk would be so easy and so delicious!

You can make this milk from any type of nut you like. I first made it with almonds and then another batch with hazelnuts. Both were equally delicious. I have some raw pistachios left over from when I made a batch of granola, so I know what type of milk my next batch will be!

I got the recipe for this basic nut milk recipe from Bon Appetit magazine, but I didn’t add as much agave as they suggested because I prefer unsweetened nut milk. You can make it as sweet as you like. I also chose to add vanilla, but feel free to omit it if you prefer the plain nut milk, or you could try adding cocoa power for chocolate milk.

Basic Homemade Nut Milk

You will need:

  • 1 cup raw nuts (almonds, hazelnuts, pistachios, pecans, walnuts, cashews, or peanuts…go nuts!)
  • 1/8 teaspoon kosher or sea salt
  • 2-4 teaspoons agave syrup (optional)
  • 1 teaspoon vanilla extract (optional)

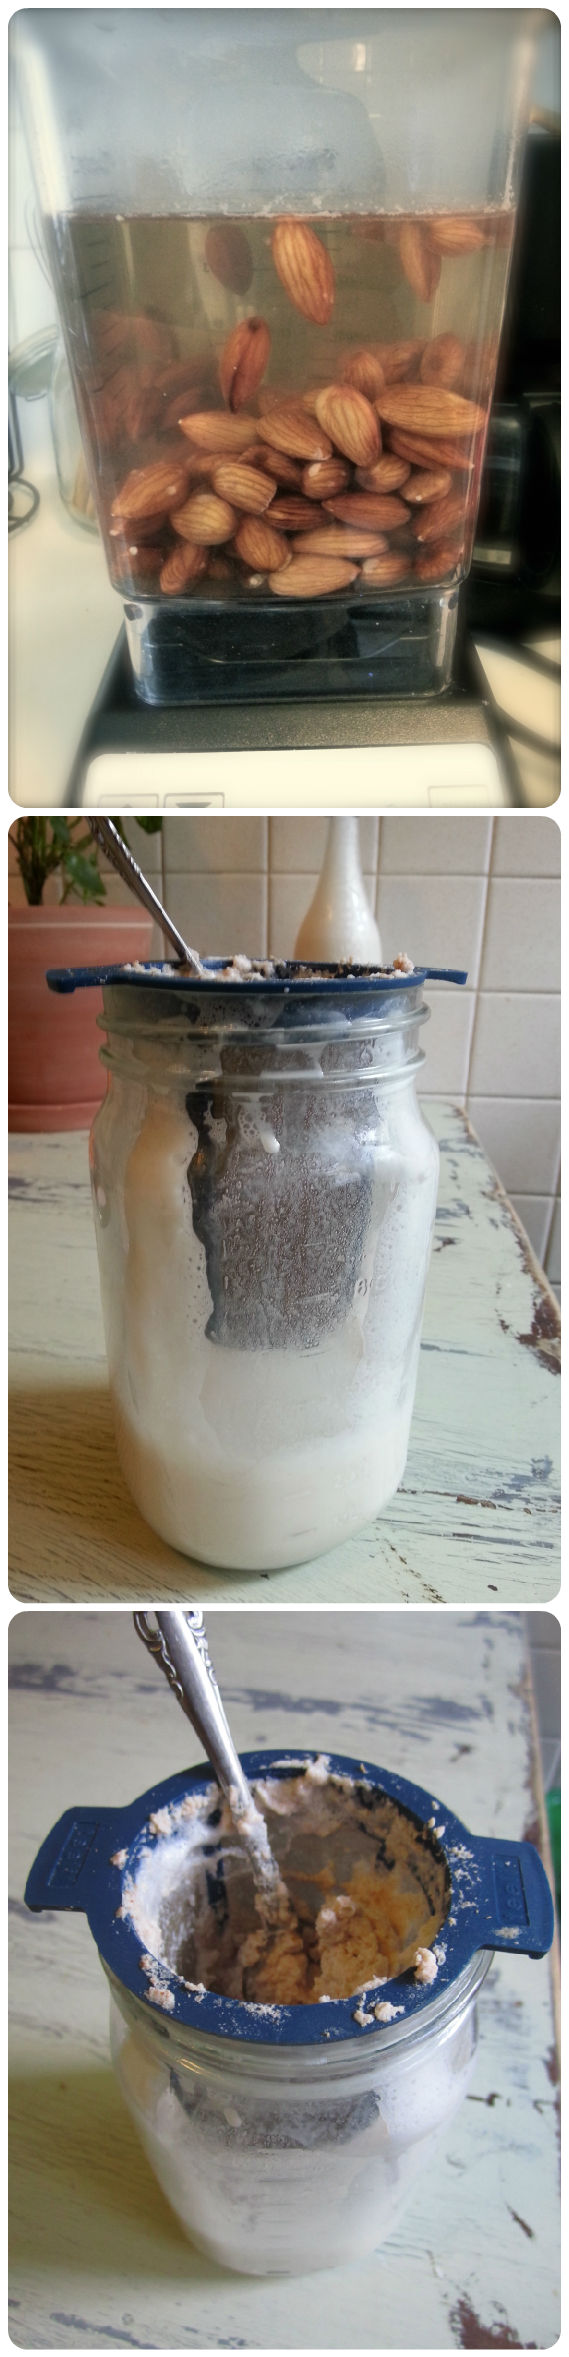
Place nuts in a large bowl and add water to cover by 2”. Let stand at least 12 hours or up to 2 days (this is key for silky, nongritty results; the longer the nuts soak, the smoother the milk will be). You can either leave the nuts out on the counter to soak or put them in the refrigerator if you plan to let them soak more than 12 hours.

Drain nuts; discard soaking liquid. Purée nuts, agave, salt, and vanilla extract (if using) and 4 cups very hot water (but not boiling; hot water yields creamier milk) in a blender on high speed until very smooth, about 2 minutes.

Strain the milk through a fine-mesh sieve or strainer into a bowl or glass jar, pressing down on the solids to get as much liquid out as possible. Thin nut milk with water as necessary to reach desired consistency (I like it creamy and didn’t need to add any additional water). Transfer to airtight container and chill until cold.

**Another variation: I had a ton of almond meal that I needed to use up, so I soaked 1/2 cup of it in water for 12 hours and then followed the recipe the from there. I̶ ̶ d̶i̶d̶n̶’̶t̶ ̶ d̶i̶s̶c̶a̶r̶d̶ ̶ t̶h̶e̶ ̶ s̶o̶a̶k̶i̶n̶g̶  ̶l̶i̶q̶u̶i̶d̶,̶ ̶ w̶h̶i̶c̶h̶  ̶I̶ ̶ t̶h̶o̶u̶g̶h̶t̶ ̶ w̶o̶u̶l̶d̶  ̶m̶a̶k̶e̶  ̶t̶h̶e̶  ̶m̶i̶l̶k̶  ̶t̶a̶s̶t̶e̶  ̶a̶ ̶ l̶i̶t̶t̶l̶e̶ ̶ f̶u̶n̶k̶y̶,̶ ̶ b̶u̶t̶  ̶i̶t̶ ̶ t̶u̶r̶n̶e̶d̶ ̶o̶u̶t̶ ̶ t̶a̶s̶t̶i̶n̶g̶  ̶j̶u̶s̶t̶ ̶ a̶b̶o̶u̶t̶  ̶t̶h̶e̶  ̶s̶a̶m̶e̶  ̶a̶s̶ ̶ w̶h̶e̶n̶  ̶I̶ ̶u̶s̶e̶d̶ ̶ t̶h̶e̶ ̶ w̶h̶o̶l̶e̶ ̶ n̶u̶t̶s̶.̶ Update: I wouldn’t recommend keeping the soaking liquid at the risk of toxins, such as phytic acid, that may be present in the liquid. So if you go the almond meal route, try to drain it as best as possible through your strainer before adding it to your blender with fresh hot water. See comments below for more on soaking your nuts. (Thanks Rick!)

The real trick to this is the tools. Having a good, high powered blender really helps to make smooth milk. If you have a regular blender, that works too, just start on a low speed and gradually turn it all the way up. Also, you really need a fine-mesh sieve or strainer (or you could use a nut-mlik bag, if you happen to have one, in which case you probably aren’t reading this because you already make your own nut milk). I didn’t have a mesh strainer so I first tried putting a coffee filter in a funnel. That doesn’t work. Don’t try that at home. Then I tried a little mesh tea infuser–voila! However, this took a long time as I had to pour the milk through the tiny infuser in batches. The next day I went to the dollar store and bought a fine mesh strainer for future use. Best investment of my life.

No matter how well you strain your milk, there will still be a little bit of sediment left in it. Just shake or stir before using.

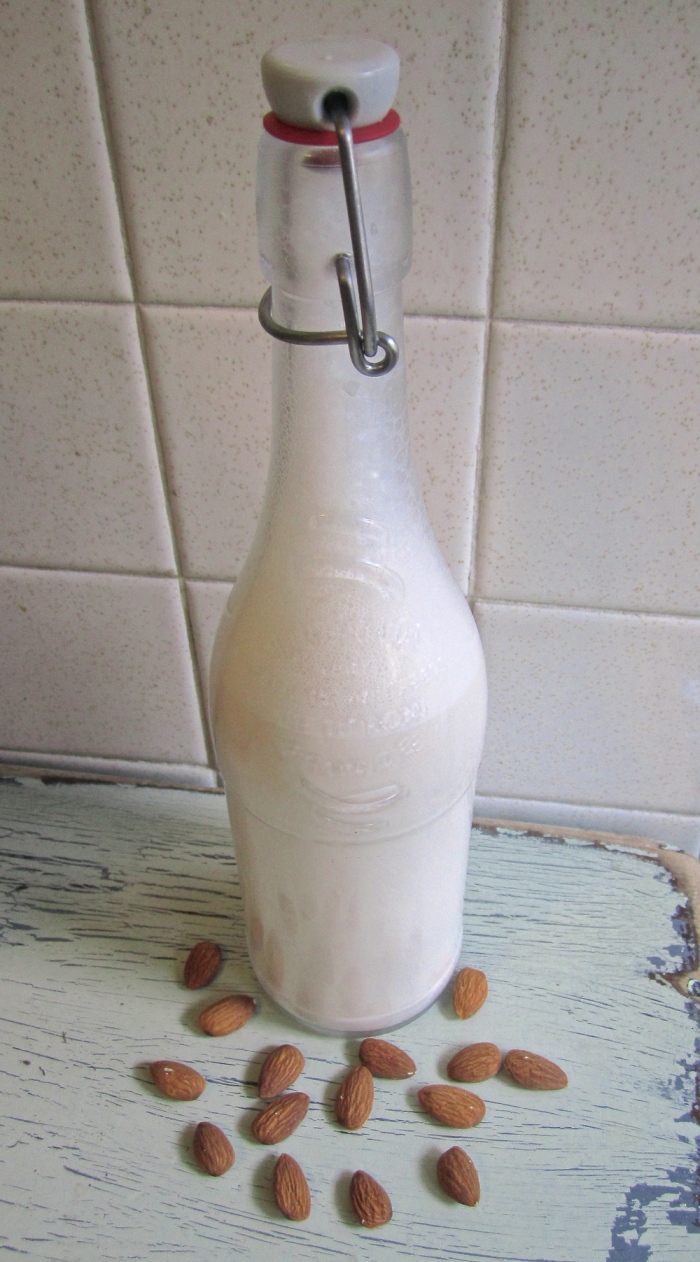
This milk keeps surprisingly well without any sort of preservatives. I kept mine refrigerated in an airtight mason jar and it was still fresh even after a week. The oils in nuts are what make them go rancid, and since pureeing the nuts releases these oils, I would guess you should use the milk up within 7-10 days. Or freeze your leftover milk to use for future baking!


The Bon Appetit recipe says to discard the pulp, but I just couldn’t bring myself to throw away all that nutty goodness. So, I decided to try and turn it into crackers. BEST IDEA EVER. Save the pulp—recipe to come next time!

Smoked Salmon Cucumbers with Dill Sauce

In addition to my Caprese Salad Skewers, one of my other go-to party finger foods are these yummy Smoked Salmon Cucumbers.  A few people asked me for the recipe for this one, so here ya go.  They’re secretly super easy, yet they look beautiful and very impressive. While these are great people-pleasers, they aren’t always the best for entertaining because you can’t really make them ahead of time. Prep your ingredients up to a day beforehand (especially the sauce), but slice the cucumbers and assemble them an hour or two before you eat them, at most, otherwise the cucumbers get a little slimy.

I love the combination of salmon, lemon, and dill. It’s especially light and refreshing in the summer. I usually make the sauce more like a tzatziki and use mostly yogurt, which you can certainly do. But for this particular occasion, I wanted something just slightly more rich and decadent, so I went the cream cheese route. Follow your heart on that one. Measurements are estimates; always adjust according to your taste!

Smoked Salmon on Cucumbers with Yogurt Dill Sauce

You will need:

  • 1 large English/Seedless Cucumber (Or 2 smaller ones)
  • 6oz Smoked Salmon
  • One bunch fresh dill (some for the sauce, some for garnish)

For the Dill sauce:

  • 1/4 cup Greek Yogurt
  • 4oz (or about half a block) of cream cheese (regular or light is fine)
  • Juice of 1 large lemon (or 2 small ones)
  • Large handful of chopped fresh dill
  • 1/4 tsp of white pepper
  • Small handful of chopped fresh cilantro (optional)

Allow the cream cheese to sit at room temperature until soft (at least an hour). Once soft, mash it with a fork until smooth. Add the yogurt, lemon juice, fresh dill, fresh cilantro (if using), and white pepper. Mix until well combined. *These were rough estimates, so feel free to add more lemon/dill/yogurt until desired consistency and taste is reached.

Slice the cucumber into even slices thick enough to hold the weight of the toppings (about a centimeter or so). Cut the smoked salmon (or flake with a fork) into small, bite sized pieces. Separate dill into individual fronds for garnish.

To assemble: Spread a little bit of your dill sauce on a cucumber slice, then add a small amount of salmon on top (careful, the good stuff can be potent!). Top each slice with a piece of dill.

Caprese Salad Skewers

This past weekend I had the great opportunity to help throw a bridal shower for my soon-to-be sister-in-law! I was in charge of food, so of course I wanted to do something special. I went all “finger” foods—no utensils required! I wish I had remembered to take a picture of the full spread, because it was beautiful. Fruit kebabs, veggie crudités and pita with hummus, lemon bars, cookies, muffins, and two of my specialties: Caprese Skewers and Smoked Salmon on Cucumbers (recipe to come next!)

The Caprese Skewers are really easy and look so pretty. We used these mini pink skewers, since it was a bridal shower, after all, and because they were a little bigger than traditional toothpicks and our tomatoes were so big! You could also use wooden skewers and stack ‘em up!

No real recipe here. Just chop up a block of fresh mozzarella into small cubes, or, if you can find it, buy the little balls of mozzarella for the added “awww, how cute!” factor.  Then chop up some fresh basil into small pieces (or large pieces, if you love basil like me). Then load up your skewers with fresh cherry tomatoes, the mozzarella, and basil. Drizzle with balsamic vinegar and voila!

You could also make them into these little “Caprese Bites“, which I did for another party in the past. Use larger cherry tomatoes or grape tomatoes. Cut each tomato in half. If using the mozzarella balls, cut each one in half as well. Use small toothpicks and stack the tomatoes, flat side down, with the mozzarella and a basil leaf on top. If done right, they should stand up on their own!


Up next: Smoked Salmon on Cucumber Bites with Yogurt Dill Sauce!

Best Breakfasts: Protein Pancakes and Overnight Oats

If there’s one thing that keeps me centered and sane every day, it’s having breakfast. No matter where I am in the world or what I’m doing, the one consistency I try to keep in my life is starting my day with some good food.

Whether you are trying to eat healthy or not, breakfast is so important. But especially if you are trying to eat healthy or lose weight, breakfast is your key to success. We’ve all heard how people who eat breakfast are more likely to maintain a healthy weight than those who skip it.  If you skip breakfast, your body stays in the fasting, starvation mode that it was in while you slept. In this state, your body holds on to fat, trying to retain fuel, not knowing when the starvation state will end. Eating within 60-90 minutes of waking up will jump-start your metabolism and tell your body to get out of starvation mode and start burning fuel. Eating breakfast also gets your blood flowing, making you more alert and awake as it delivers nutrients to your body.

Here are a few of my go-to breakfasts.

When I need something quick that will fill me up for a long day, I go for one of the following:

  • Granola with Greek yogurt, homemade almond milk, or kefir (Make your own granola—it’s so easy!)
  • A slice of whole wheat toast with all natural peanut or almond butter and sliced banana or apple
  • Oatmeal (sweet or savory!)
  • Eggs, cooked as desired with whatever veggies I have on hand
  • A smoothie with whatever fresh or frozen fruits I have on hand, a scoop of protein powder, and whatever milk, yogurt, or kefir you like. Add water to thin as desired, or a handful of whole grain oats to thicken it and make it a more filling meal.

 When I have more time to spare, I love to treat myself to a slow-paced morning of reading, sipping my tea, and whipping up some of these:

Gluten-Free Protein Pancakes

  • 1/2 scoop vanilla protein powder (A post to come soon on my favorite brands…I like plant-based, soy-free powders!)
  • 2 Tbsp almond flour
  • 1/4 tsp baking powder
  • 1/4 tsp cinnamon
  • 1/4 tsp vanilla extract
  • 1-2 Tbsp Old Fashioned oats
  • 2 egg whites
  • 1-2 Tbsp unsweetened applesauce OR mashed ripe bananas

Blend it all together, and then…well you know, do the pancake thing. Serve with maple syrup, honey, or vanilla Greek yogurt and top with any fresh fruit!

And when I really have ZERO time to make breakfast, (read: I’m way too familiar with waking up at 3:30am to be at the airport at 5am…) I might make a smoothie the night before and stick it in a travel mug for the next day, or I do my go-to of “Overnight Oats” (credit for the name goes to Catherine of Rabbit Food for My Bunny Teeth!) Here’s how to make them:

Overnight Oats

In a jar or portable container, combine 1/4 cup old fashioned or steel cut oats, water or milk of your choice (just enough to cover the oats), and any add-ins that you like (try some of the same combinations you use for conventional oatmeal!). Mix it all together and leave in the fridge overnight. And in the morning, voila! The oats have soaked up the liquid and softened to the same texture as if you had cooked them. I often grab the jar as I run out the door and eat them cold, but you could also throw the container in the microwave for a minute or two just to warm them up (make sure to use a microwave-safe container!).

With so many fast and easy options, breakfast is one of the easiest meals to get right. And if you can eat healthy for breakfast, then you are already guaranteed to have one-third of your meals be healthy ones—that’s huge! It gives you more wiggle room to indulge later on. So don’t waste the glory of breakfast on sugary cereals or greasy drive-through meals when you can so easily do better and have something more eatable.

Good Greens Giveaway!

So I mentioned that when I travel there are always a few go-to snacks that I take with me, and this is one of them.

I know I say that one of my conditions for finding eatable food is avoiding the processed stuff. And yes, one of the ways to avoid eating anything uneatable is to look at the label and try not to eat anything with more than five ingredients listed. However, this product is one of those exceptions to the guidelines. While there are more than five ingredients on the label, each of them is something you can feel good about. Let me introduce you to Good Greens Bars!

These bars are all natural, vegan, gluten-free, low glycemic, and made with organic ingredients. They contain omega-3’s, probiotics, antioxidants, AND 100% of your daily fruits and vegetables! Throw in the 10g of protein per bar, and you’re looking at a pretty complete package. The secret to bringing you all of these health benefits is their Good Greens Superfood Powder, which is a blend of the highest concentration of the world’s best super green foods, berries, and other whole food ingredients. See how they compare with other “health food” bars:

Last week I ran a 10K in Chicago and saw a tent for the Good Greens bar after the race. I was so excited to go and try some of their new flavors! Some of my favorites include the Pumpkin Spice and Chocolate Mint. I also love their raw Wildberry bar, and the Chocolate Coconut, which tastes just like a Mounds bar, but without all the guilt! I sampled some of their new Soy Greek Yogurt covered bars too, including Pomegranate Acai, Apple Crumb, Banana Nut, and Blueberry. So many good flavors to choose from! I was gushing to the promoting team at the tent about how much I loved their bars and how I wanted to spread the word, so they gave me a variety pack to try and share with you all! So this week I’m doing my first giveaway. One lucky reader will win a free sample pack of Good Greens Bars! All you have to do is fill out the form below.

Of course, I always suggest eating whole foods over processed foods, but let’s be real. We can’t do it all the time and sometimes we need a little help to get the missing nutrients in our diets. Even Good Greens admits on their website that, “there is no substitute for also eating your 5 fruits or vegetables per day.” But Good Greens make for a wise choice when you need a quick, easy snack, or to replace those otherwise uneatable snack choices.

You can purchase boxes online, or go to the store locator tab on their website to find where you can guy these bars near you. If you’re in Chicago, many Mariano’s, Jewel’s, and now a few Target stores carry them! Check them out for more information about the health benefits of Good Greens, and try them for yourself!

One lucky Eatable Food reader will win a Good Greens Sample Pack!
Contest ends on Friday, July 4 at 11:59pm CST.
*Open to US residents only.

a Rafflecopter giveaway

I’m heading out of the country now for a few weeks, so I’ll be MIA for a while. Good thing I have a whole stash of Good Greens to take with me on the road! See ya later eatergators!

Chicago Food Bloggers and Restrauant Review: Coppervine

This week I had an amazing opportunity that just reinforces why I love food so much. It is a complex art that can bring people together for amazing shared experiences. I am finally back living in Chicago (like, more than one night a week), so I was able to attend my first Chicago Food Bloggers Dinner! It was held at the newly opened Coppervine in Lincoln Park. Besides all the amazing food and drinks (which I’ll get to next…) the best part about the night was meeting other fellow food bloggers who are on the same pursuit as me: to discover amazing food. I loved chatting with Ashley, Katie, Peter, and Bill, hearing their stories, learning about their passions, and being inspired by their pursuits. And it was so fun to meet them all under the context of sharing an amazing meal together and having those “OMG are you tasting what I’m tasting?!” moments. Also, when you dine with other food bloggers, you don’t feel so bad about taking pictures and notes on everything you eat, because they’re all geeking out about the meal and doing it too!

Coppervine is a unique dining experience. Their main concept is a focus on pairings: “We are in constant pursuit of the perfect pairing. In its most basic sense, a great pairing occurs when the food and drink taste better together than apart—when the flavors of one enhance, complement, or uniquely contrast the other.” Everything on the menu includes a suggested pairing of a wine, beer, and cocktail. You can pick what you want to eat first and then pair it with your drink of choice, or choose what you like to drink first and then find what dish would taste well with it. Either way, you’re guaranteed the perfect flavor pairing.

We had the pleasure to meet and talk with the owner and creator of the concept, Don Sritong. He shared with us his passion about pairings and the inspiration for the restaurant’s menu. In some cases, the food inspired the drink selections, while in many cases the drink came first and then inspired the talented Chef David Wang to create a dish to complement.

Note: they were also incredibly accommodating to some of the other bloggers’ diet restrictions, and are happy to modify or recreate a dish to suit your needs and preferences.

Here’s how we dined:

First course was the Blue Lump Crab Fritters with Smoked Corn, served with a Guindilla Pepper Aioli. It was paired with the Brooklyn Blast IPA by Brooklyn Brewery. I usually don’t like IPAs (beer snobs, be quiet. Hops are not for everyone). However, in this instance I was amazed just how much Don’s words rang true: eating the food with the beer really did change the taste of both! It was “spice and spice” and it totally worked. The IPA brought out the spiciness of the Crab Fritters, and the heat from the peppers balanced out the bitterness of the IPA in such a way that made it so enjoyable to sip.

I also throughly enjoyed the Arugula Pesto Flatbread with Granny Smith Apple, Parmesan, and Truffle. I thought it would be paired with something to contrast the tartness of the apples, but the pairing with J.K’s Scrumpy Farmhouse Organic Cider was just beautiful. The apple in both the Cider and the flatbread really enhanced the flavor of the other.

In the next round, cocktails were paired with our medium sized plates. My favorite cocktail was the Four Grapes made with Pisco, Passionfruit, Honey, Egg White, Cranberry Ice, and Habanero. Yes, Habanero! It has just the perfect little amount of heat to balance out the sweetness and it was soooo tasty.  I also loved the gin cocktail, The Standard, with St. Germain, lemon, and egg white, it was a refreshing summer cocktail that paired well with all of the dishes in the course. These included the rich Tempura Squash Blossoms stuffed with Gournay Cheese over a salad with Smoked Peaches and Hazlenut Vinaigrette, the perfect-for-spring English Pea Agnollotti with Haricot Vert, and, the not to be missed Diver Scallops with Morel Mushrooms and English Peas. All of the dishes had clearly spring/early summer inspired ingredients and were among my favorite flavors of the night.

On to the main course. We started with Fried Chicken and Sparking Wine. I’m still new to the idea of pairings, so I was unaware that this is apparently one of the most well-known and classic food/drink pairings, and I can see why. The effervescent French Sparkling Wine was crisp and bright, just like the perfect crispness of the Fried Chicken with a Sriracha Mayo. Another favorite of mine was the incredibly decadent and buttery Maine Lobster BLT, paired nicely with an aromatic and floral Chardonnay. We were also treated to an amazing Lamb T-Bone with Heirloom Baby Carrots and a Mint Chimichurri, paired with a fruity Rhône-style red blend.

And if we hadn’t had enough already, out came dessert. The most amazing Warm Chocolate Molten Cake came paired with a Black Port Wine: “Decadence on decadence,” as Don said. I say, “To die for.” And last but not least, another favorite of the evening was the Rhubarb Apple Cobbler, paired with the tart and fruity Strawberry Lambic. What really topped it off was the Crème Fraîche Mint Ice Cream that came with it. I MUST figure out how to make this!

This night was an amazing experience, and I am now in love with Coppervine. I never realized just how much the perfect pairing could enhance your meal so much. Each bite and sip was so complex and full of flavor, that it made for a dining experience unlike any other. It has inspired me to try to do pairings with my own recipes at home!

Food is so much more than just fuel: it is an experience. It was when I finally learned how to truly enjoy what I eat (and drink) that my relationship with food became a healthy one. And meals like those at Coppervine can really help you remember to slow down and savor all that is eatable about your food.


Travel: How to Eat and Live Healthy when You’re On-The-Go

I know my posts have not been very frequent lately, and I apologize. My job takes a lot out of me right now, and I’ve been finding myself busier and more exhausted than ever before. Although it’s never a good excuse, I use my busy life and my job as my excuse for not finding time to write more posts. It’s not even that I don’t have time to write, it’s that I don’t have time to DO things that I can write about. I travel for work, and by that I literally mean that travel IS my work. So I’m never home. I try as best as I can to eat healthy on the road, but my schedule is so inconsistent that it is hard to stick to any real routines or healthy habits on the road. Lately, I only have one or two days a month in which I can actually cook at home (hence the lack of recipe posts!) Some people love living on the road, but it’s not a lifestyle I suggest for anyone who wants to make living healthy a priority. The combination of an inconsistent sleep schedule, a stressful work environment, being forced to eat out all the time, and having inadequate access to cooking facilities and quality fitness facilities = recipe for a health disaster (at least for me). Yes, yes, friends and family. I’ve been talking about it for months, and it’s true: I’m getting out soon!

I don’t mean to moan and complain. We ALL have busy lifestyles and all have obstacles that can get in the way of our health. But I have learned some tricks along the way. So here are a few ways that can help you stick to healthy choices while you’re away from home (or even while you DO get the pleasure of coming home every night but can’t seem to find that time to be healthy!)

Let’s start with food.

Yes, I always bring my own food when I travel, and people are ALWAYS asking me what I eat when I’m away from home. So here are my eatable go-tos when I’m on-the-go:

  • Cut up veggies and hummus
  • Hard boiled eggs (see previous post!)
  • Nuts and dried fruit (no sugar added)
  • Salads (a good way to use up whatever veggies you have that are going to go bad while you’re away!) For dressing, I just throw a few lemon wedges on the side, or take a small container of either salsa or olive oil and balsamic vinegar.
  • Any fresh fruit. (Keep the little stickers on them if you’re traveling internationally to avoid trouble with customs!) Apples and oranges travel best, but I love bananas too (A tip: wrap your bananas in tin foil. It prevents bruising AND prevents the rest of the food in your bag from smelling like bananas.)
  • Turkey, cheese and/or avocado, with whole wheat crackers or on whole wheat bread.
  • Greek yogurt with granola
  • All natural peanut butter or almond butter
  • Oatmeal. I mix plain instant oatmeal with a scoop of protein powder and nuts or some fruit. Easily made in any hotel with the coffee maker, or on an airplane–just ask for hot water!
  • Tabbouleh, or my go to cold salad: chickpeas, sliced cherry tomatoes, cucumber, basil, and parsley with a little lemon, olive oil, and balsamic vinegar. Or I sub quinoa instead of chickpeas and add black beans.
  • Edamame, cooked or dried
  • Soup—I usually make a big batch at once and freeze it in individual containers. Then, when I leave for a trip I grab a few containers, and by the end of the day or the next day, they are thawed and ready to eat!
  • Single serve pouches of tuna or salmon (to top on salads or eat with crackers)
  • Any leftovers! (I love cold leftovers, so never having access to a microwave is never a problem for me.)
  • And when I don’t have time to prepare anything, I usually have good, healthy bars on hand to throw in my bag. I like Kind Bars, Larabars, Good Greens, Element Bars…the list goes on. There are so many good ones on the market today! Just read the ingredients, and make sure you know what everything is (i.e. it’s eatable). I also look for ones with lower sugar content and higher protein content. Or, I just make my own! (Another recipe to come soon… you know, when I have the time…)

And now let’s talk fitness.

Fortunately, I’m usually staying in hotels that at least have something they qualify as a fitness center, even if it’s just one run-down creaking old treadmill from the eighties in a basement (not exaggerating). Some are nicer than others. But when the hotel fitness center doesn’t cut it, or running outside isn’t an option, there are a few moves that you can do anywhere without any equipment. Yes, these are old school, but there’s a reason they are still around: done consistently, any move is effective!

  • Squats
  • Lunges
  • Push-ups
  • Tricep dips
  • Planks
  • Jumping jacks
  • Burpees
  • Jumping rope (sans rope still works)

…and so many more. I’m not a fitness expert. Just google “no equipment fitness/workouts” or anything similar and you’ll get millions of results with plenty of new variations on old favorites. I usually do a circuit of a combination of all of these moves, doing as many reps of one move as I can in a minute and then switching, no rest in between moves until the end of the circuit. Invest in a resistance band too. These are cheap and travel well, and give you thousands more options for hotel-room workouts!

  • Another go-to workout for me is running stairs. It sounds boring and old fashioned, but it’s SUCH a good workout. I find that five to six flights is a perfect interval for me. I run up as fast as I can, and then recover by walking down and repeat for about 20 minutes. Or, I just go slow and steady up and down for more like 30-45 minutes. You’d be amazed how empty hotel stairwells are. I just crank up the music on my phone or turn on an audio book and I can go for hours.

When I don’t feel like thinking as much about a workout, I just turn on some good music and rock out for a while. Yes, I have hotel room dance parties by myself on the regular. And I’m not ashamed. I might even jump on the beds sometimes. Okay, now I’m ashamed.

Or I just get out there and walk! Especially when I’m in a new city, exploring by foot is the best way to see the sights or find hidden gems.

A few more tips for staying healthy on or off the road:

  • Stay hydrated. Get a good BPA-free water bottle and carry it around with you everywhere! Refill often. I try to drink at least 64oz of water a day (about 2 liters), but usually more like 100oz or 3 liters on days when I’m up in the air a lot (altitude dehydrates you) or when I have an intense workout.
  • Get sleep (easier said than done, I know). Shoot for 7-9 hours a night. Without good rest, any other healthy practices are in vain. Sleep time is when your body recharges and heals! We keep hearing it because it’s true: get your zzzz’s!
  • Move as often as possible. Have you heard sitting is the new smoking? It’s true. Sitting so much is killing us. If you sit all day, try to get up and take frequent short breaks, even just to stand up (at least 5 minutes every 30-60 minutes. Get a smaller water bottle so you have to get up to refill it often!) Take the stairs, park farther away, pace your office while you’re on the phone… whatever you can. All the little stuff adds up.
  • Relax. Take a few minutes every day to do something you enjoy, talk to someone you love, meditate, or whatever it is that keeps you sane. Remember to breathe and count your blessings every day.

I hope these tips help you keep on track no matter what your lifestyle. Because remember, being healthy IS a lifestyle, not a fad or a temporary phase. It’s about forming good habits and making a lot of small choices that add up!

Oh, and be grateful if you do get to come home to your own kitchen every night–take advantage of it for me, because I don’t get that luxury!

Oatmeal: Sweet or Savory

I always joke that if I had to choose my last meal on earth it would be oatmeal. I’m only half-kidding. Oatmeal is one of the most delicious and comforting foods for me. Plus it’s so easy to make, so healthy, and I love that it’s like a blank canvas: you can do oatmeal a million different ways.

I use either 100% Whole Grain Old Fashioned Oats, or Steel Cut Oats. You can also find gluten-free oats, if you desire, but I’d stay away from the quick cooking instant oats if you can. I find these varieties to be a little more processed with added ingredients that I could do without. Whatever oats you choose, just please, PLEASE do not use the packets of flavored instant oatmeal. That’s not oatmeal. That’s a packet of sugar and artificial flavoring with a few oats throw in. Eat them as a dessert if you must, but not for an eatable breakfast. In only a few more minutes, you can make delicious and nutritious oatmeal anytime. And if you like the pre-portioned convenience and portability of instant oatmeal, buy your old fashioned oats in bulk and then divide it up into baggies for the week or to take with you on the road (more cost effective this way too!).

Like I said, oatmeal is a blank canvas. You can add anything you like. Here are a few of my favorite combinations:

-Fresh berries (or dried) and nuts
-Apple or pear with cinnamon and walnuts
-Pumpkin puree, pumpkin pie spice, maple syrup and pumpkin seeds or pecans
-Banana and peanut butter (and maybe a few dark chocolate chips thrown in..)
-Cardamom, cinnamon, and coconut flakes
-Chopped dates and nuts

If you like your oatmeal a little sweeter, you can try adding any of the following to liven it up:
-Honey
-Maple syrup
-Chopped dates
-Sweetened protein powder (See note below!)
-Stevia
-Cinnamon or vanilla

Try adding one or more of the following to give your oatmeal an extra health punch:
-Ground flax seed
-Hemp seeds
-Chia seeds
-1 tablespoon coconut oil
-Sub half of the oats for cooked quinoa
-A dollop of plain Greek yogurt for added creaminess and protein
-A splash of milk of your choice
-Half a scoop of protein powder (look for the good all natural stuff! I prefer plant-based protein instead of whey or soy. A post on protein powders coming soon!)


Sometimes I want more a savory breakfast instead of something sweet. Well, have you heard of this new trend of savory oatmeal? It may sound weird, but give it a try. It helps not to think of it as oatmeal, since we are so accustomed to sweet oatmeal. Think of it more like a grain, such as rice or barley, but for breakfast. I find that the Steel Cut Oats work better for savory oatmeal, since the texture is more grainy than traditional oatmeal. Mixed with savory ingredients, it almost tastes more like quinoa or Bulgar rather than oatmeal. I always feel good about starting my day off with some greens and protein. But savory oatmeal makes an awesome lunch or dinner too! It’s even good cold, so it travels well for an easy, healthy meal on the go. Try some of these combinations in your savory oatmeal, or create your own! (Add a little salt and pepper or other spices if you like.)

-Chopped ham or lean ground turkey sausage and shredded swiss cheese
-Cooked kale and butternut squash
-Bacon (get the eatable stuff please!) with maple syrup OR shredded cheddar cheese
-Fresh figs or fig jam with a little bit of brie or other salty cheese
-Sauteed spinach, garlic, and sun-dried tomatoes
-Broccoli and nutritional yeast (don’t know what this is?? I’ll tell you soon–it’s one of my new found favorite ingredients!)
-Black beans, corn, avocado, and salsa
-Fresh basil and softened tomatoes (or tomato sauce), topped with parmesan or mozzarella cheese
-Sauteed veggies of any kind

Breakfast, lunch, or dinner: oatmeal is always my go-to for a quick, cheap, healthy, and delicious meal! What’s your favorite oatmeal add-in?

Increatable Eatable Eggs

I want to talk about one of my favorite foods: eggs! I can eat eggs for any meal of the day. When I travel for work, a few hard-boiled eggs are always in my lunch bag for a go-to snack. And a fried egg can take any dish to the next level. Eggs are one of the most versatile foods. They are a means to an end and an end in themselves. They can be used as a binding agent, thickening agent, or to add frothy texture to meringues or fancy cocktails. And if you can master the egg, you can make thousands of different dishes. I add them to salads, sandwiches, burgers, soups, stir-frys, and even pizzas!

These guys are seriously good eats with some major health benefits. Very few foods are as nutrient-diverse as eggs.

One egg contains:

-6 grams of protein in only about 75 calories. (It’s also one of the most easily digestible forms of protein, making it a great start to your day or as a post-workout snack.)
-Vitamin A (retinol)
-Calcium
-Many B vitamins like folic acid, choline, and biotin. (Most people are deficient in one more more B vitamins.)
-Potassium
-Vitamin E (acts like an anti-oxidant to fight free radicals that can cause cancer)
-Essential minerals like iron, zinc (good for your immune system!), and phosphorus (important for healthy bones and teeth)

And the poor yolk has gotten such a bad rap. But guys, NEWSFLASH: Eat the yolk! It’s good for you and will not, as we have been told, cause high cholesterol. There’s no evidence that eating eggs will increase your blood cholesterol levels or increase your risk of heart disease. Eggs do contain “dietary cholesterol”, which is different from the “blood cholesterol” found in your body. But the body needs a certain balance of cholesterol, and eggs contain the good kind of fats that we need. In fact, many of the nutrients found in eggs, such as vitamin A, are better absorbed with fat. So there is no need to avoid this most decadent part of the egg. In fact, the yolk is where most of the vitamins and nutrients are found (over 90% of the egg’s calcium and iron are in the yolk!) So please don’t toss those yellow orbs of goodness.

Of course, not all eggs are created equal. If you can, I advise buying cage-free or free-range eggs. Research has shown that cage-free hens produce eggs higher in various vitamins and the hens are given fewer (if any) antibiotics.  In fact, free-range eggs actually show greater resistance to bugs like salmonella. I don’t think it’s as important to go “organic” with eggs, but it can’t hurt. However, I’m not sold on the idea of “omega-3” eggs. This just means that the hens were given feed which contains omega-3s (often genetically-modified grains), but research is weak to show that the eggs actually contain more omega-3s or that our bodies can even process it as needed. So don’t waste the extra money–you can get your omega-3s from plenty of other more natural sources.

How do I like my eggs? Let me count the ways. Here are just a few ways I enjoy eggs: (I seem to have found a little inspiration in my recent getaway to the Southwest…)


  • Top a warmed tortilla with a fried egg for a quick version of huevos rancheros. I crisp up my tortilla over the flame on my stove-top or under the broiler, then top with avocado, tomatoes, salsa or salsa verde, one fried egg, salt and pepper, a squeeze of lime, cilantro, and sriracha. (You could also add black beans, refried beans or cheese to make it even more huevos rancheros-y.)


  • Add a few chopped hard-boiled eggs or a poached egg to a salad to add protein and great texture. (See below for how to make a perfectly poached egg and fail-safe hard boiled eggs) With a runny yolk and a squeeze of lemon, I don’t even need dressing on my greens!


  • Add a few mashed hard-boiled eggs to your guacamole to add protein and creaminess. Or use more eggs to make my Avocado Egg Salad:
    Combine 4-5 chopped hard boiled eggs, one mashed avocado, chopped tomatoes, chopped celery and chopped onion, salt, pepper, lime juice, and cilantro. Mix it all up and eat it on a sandwich, over a salad, or in a tortilla.

Tips for Perfect Hard Boiled Eggs:

-Use eggs that are several days old (buy them at least 5-7 days before boiling). This gives the membrane a chance to release a bit from the egg, making them easier to peel.
-Put the eggs in a single layer in a saucepan and cover by an inch or two with cold, salted water.

Boil one of two ways. Either:
1. Turn up the heat to high until the water comes to a boil. When it reaches boiling, reduce the heat to low and let simmer for one minute (or if you have an electric stove, just turn off the heat for a minute.
-Remove the pan from heat, cover, and let sit for 10-15 minutes, depending on how done you like the yolk (time will vary depending on size of eggs, type of pot, your stove….so many factors. Just experiment.)
or
2. Keep the water at a low boil for about 4 minutes for runny yolks, 10 minutes for fully set yolks, and anywhere in between for slightly runny/mostly set yolks. These times are for 4 eggs. Increase time by 2 minutes for each additional 2 eggs.

-Drain the water and add ice-cold water to the pan to stop the cooking process or keep the pan running under cold water for a few minutes until cooled (refresh water a few times, as the eggs will quickly warm the water again). Place immediately into the refrigerator to peel later, or you can peel them right away.

-When peeling, make a small crack on the bottom of the egg, Then, roll the egg gently in your hand to crack the shell all over. For even better results, peel under cold running water.

Tips for a perfectly poached egg:

-Crack the egg into a separate dish or ramekin.
-Bring salted water to a steady boil, then lower to a simmering boil.
-Add a splash of vinegar to the water, if desired (helps the egg to set when you drop it in the water, but will affect the taste a bit)
-Stir the water in the pan to make a vortex in the middle. Quickly and carefully pour the pre-cracked egg into the center of the vortex.
-Give the water another swirl with a spoon or fork to keep the vortex going and preserve the egg’s neat shape.
-Cook to desired doneness. I like my poached eggs to have a runny yolk, which I find takes about 3-4 minutes.
-Remove the poached egg with a slotted spoon and place on a paper towel to absorb extra water before serving.

The possibilities are endless, so get out there and eggsperiment!

Let’s Make the Internet a Better Place

If you’ve noticed a new little button at the bottom of my posts that looks like this:

it’s because I’ve partnered with an awesome start-up called CentUp. With a simple click, they allow you to show some love to your favorite bloggers and online content creators AND help support charities at the same time. Think of it as a “like” button that does so much more. If you want to “like” one of my posts, you simply click the CentUp button and you can support me and support a charity with a few cents. Anytime you click on a CentUp button, half of what you donate goes to the author and half goes to charity. The default donation amount is only $0.05 (which you can obviously increase), so it is really only a few cents–but it all adds up! I’ve chosen for my donations to go a foundation that is near and dear to my heart: the Lynn Sage Foundation, which helps fund breast cancer research.

I encourage you to create an account, so that you can support some great charities and also support other bloggers like me that want to do more with their content. As CentUp puts its, you can “reward your favorite creators and make the world a better place with the click of a button.” Come on, you’re online reading content all day anyway. Why not throw a few cents to your favorite content creators so that we can make more of whatever it is you like, and you’ll be donating to some great charities. Together, we can make a huge difference!

Thanks for all your support. And if you create original content online too, consider partnering with CentUp to support charities of your choice with your content!